Setting up your Outlook Desktop Client for MailSafi Email
We use peter.simba@kachooks.com as an example user in the step by step guide below
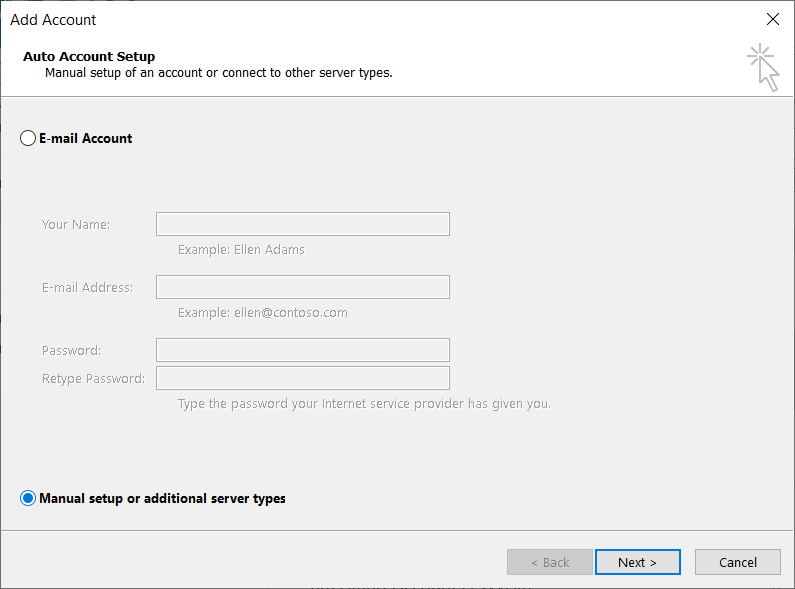
Step 1: Click on File, Add Account and then Manual setup or additional server types then click Next.
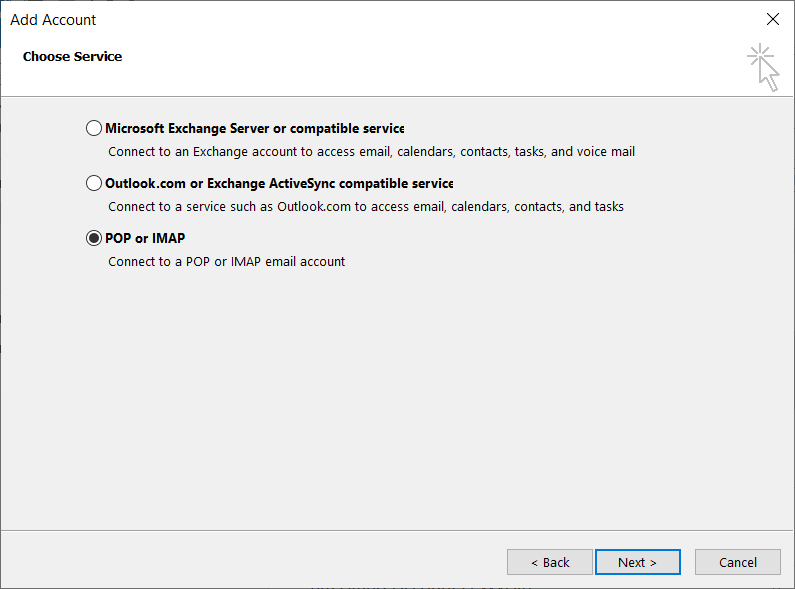
Step 2: Choose service POP or IMAP and click Next.
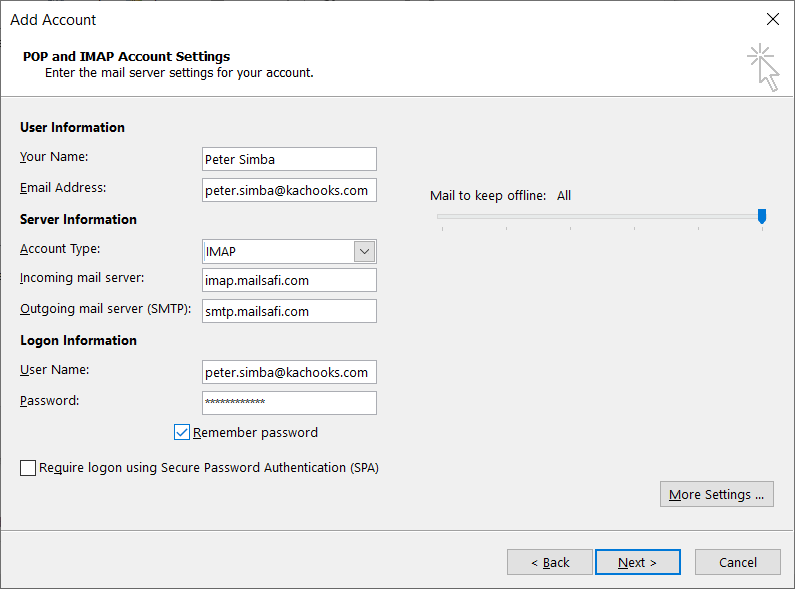
Step 3: Fill in your POP and IMAP Account Settings as shown below. NB: When entering your password, we recommend that you use an app-specific password. You can generate one by logging onto your webmail.
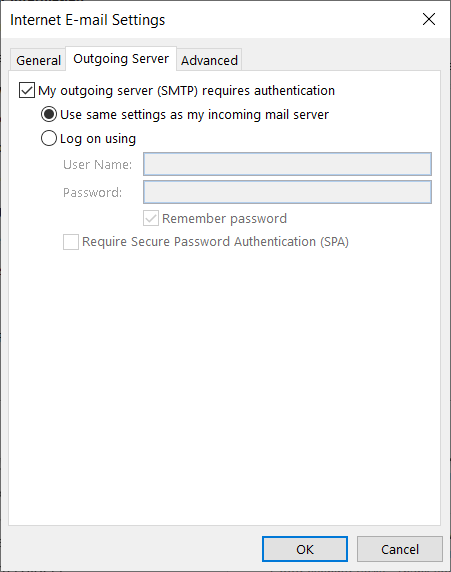
Step 4: Click on More Settings and then choose the Outgoing Server Tab and choose option to use same settings as incoming server as shown below.
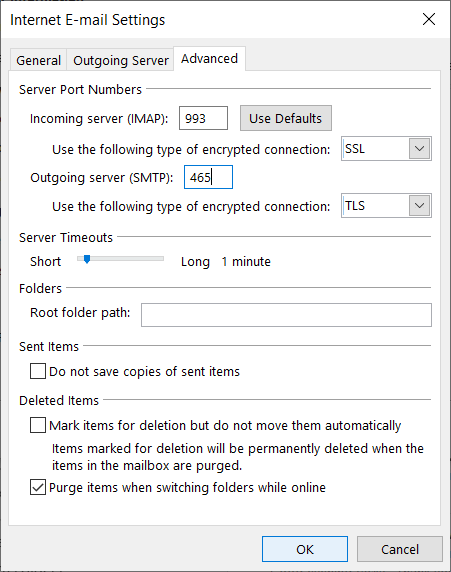
Step 5: Click on the Advanced Tab and enter incoming server for either POP3:pop.mailsafi.com port 995 or IMAP:imap.mailsafi.com port 993 with SSL/TLS or auto as encrypted connection and outgoing server 465 or 587 with TLS or StartTLS respectively or auto as encrypted connection as shown below and then click OK.
6. Click Next and wait for your setup to complete.