Setting up iOS Mobile Device for MailSafi Email
This guide gives a step by step guide on how to set up your iOS device to receive MailSafi Email. We use an example user peter.simba@kachooks.com in the guide below.
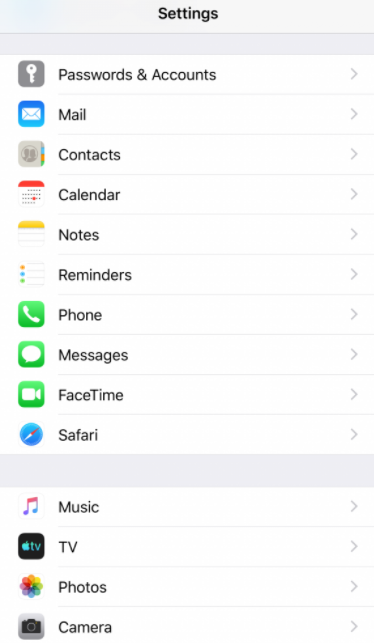
Step 1. Go to settings
Step 2. Click on Passwords & Accounts.
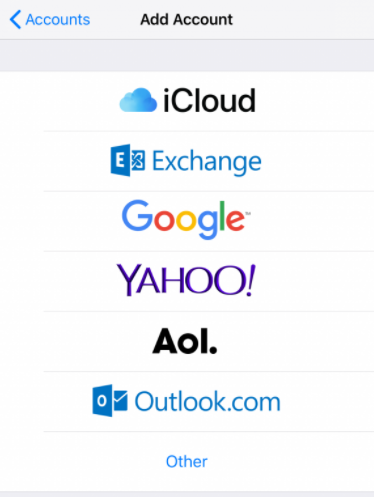
Step 3. Click on Add Account.

Step 4. Click on other
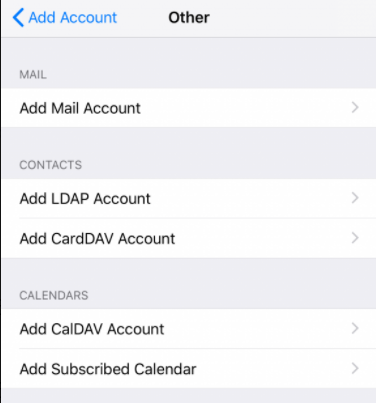
Step 5. Click on Add Mail Account
Step 6. .Click New Account and enter details and then click Next.
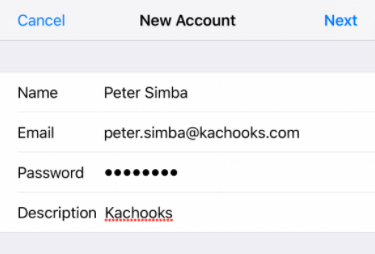
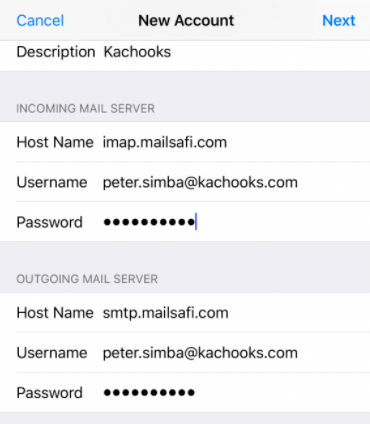
Step 7. Under the New Account Screen enter
Incoming Mail Server
Host name: imap.mailsafi.com
Username: peter.simba@kachooks.com
Password: [enter your email password]
Port: 993
Security Type: SSL/TLS
Outgoing Mail Server
Host name: smtp.mailsafi.com
Username: peter.simba@kachooks.com
Password: [enter your email password]
Port: 465 or 587
Security Type: SSL/TLS or StartTLS
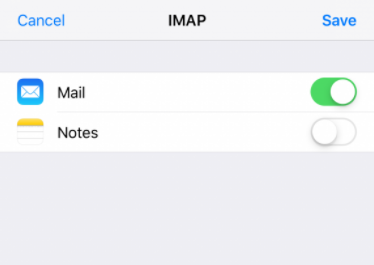
Step 8: Click Next.
Step 9: Click Save.
Step 10: Now open your email app and you should be able to download, send and receive email.