Configuring MailSafi Account on Gmail App for Mobile
This guide gives a step by step guide on how to set up your MailSafi account on Gmail App for mobile. We use an example user peter.simba@kachooks.com in the guide below.
Step 1. Open Gmail app
Step 2. Click on the icon on the top right of the page and select Add another account from the menu.

Step 3. On the Set up email page, choose Other.

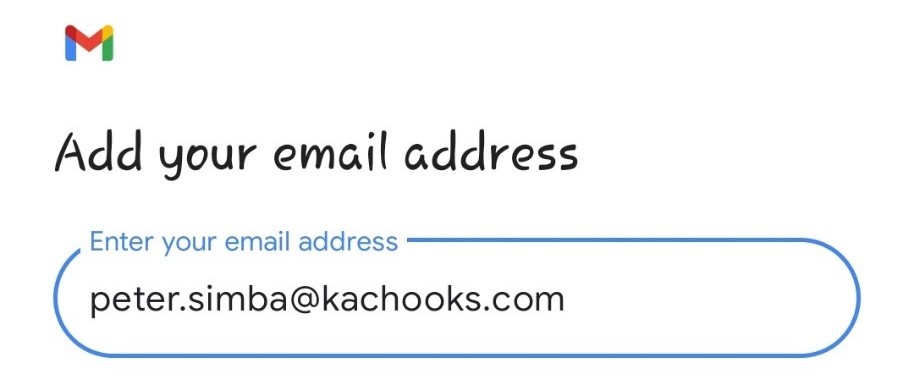
Step 4. .Enter user email i.e. peter.simba@kachooks.com
Step 5. Select Manual Setup at the bottom left to proceed.

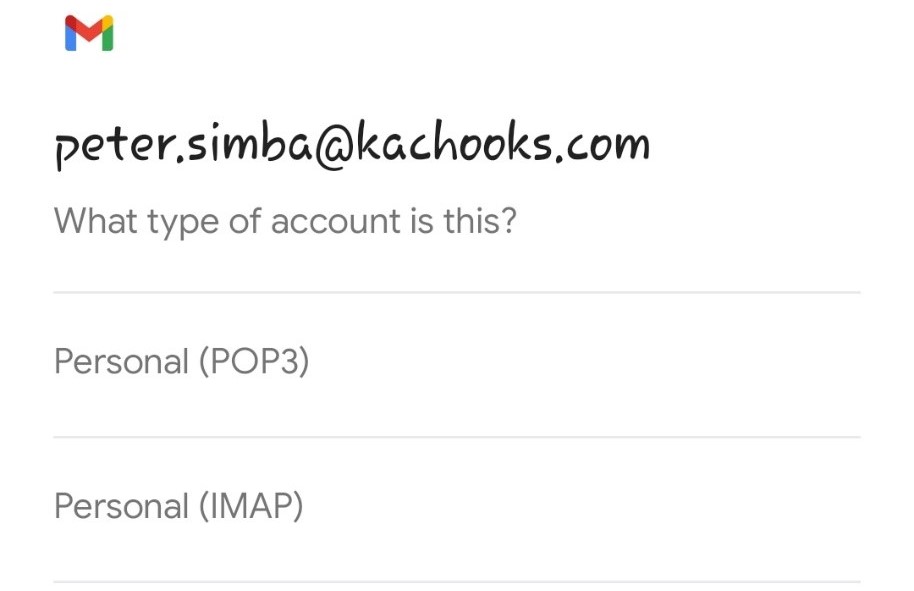
Step 6. Select type of account i.e. IMAP
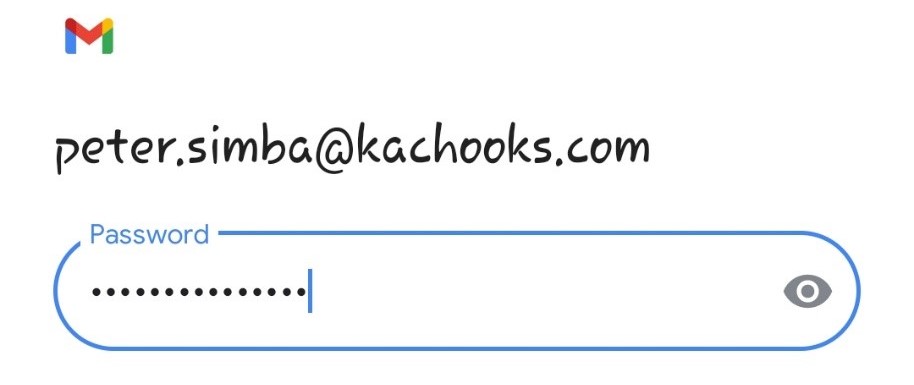
Step 7. Enter your password and click Next.
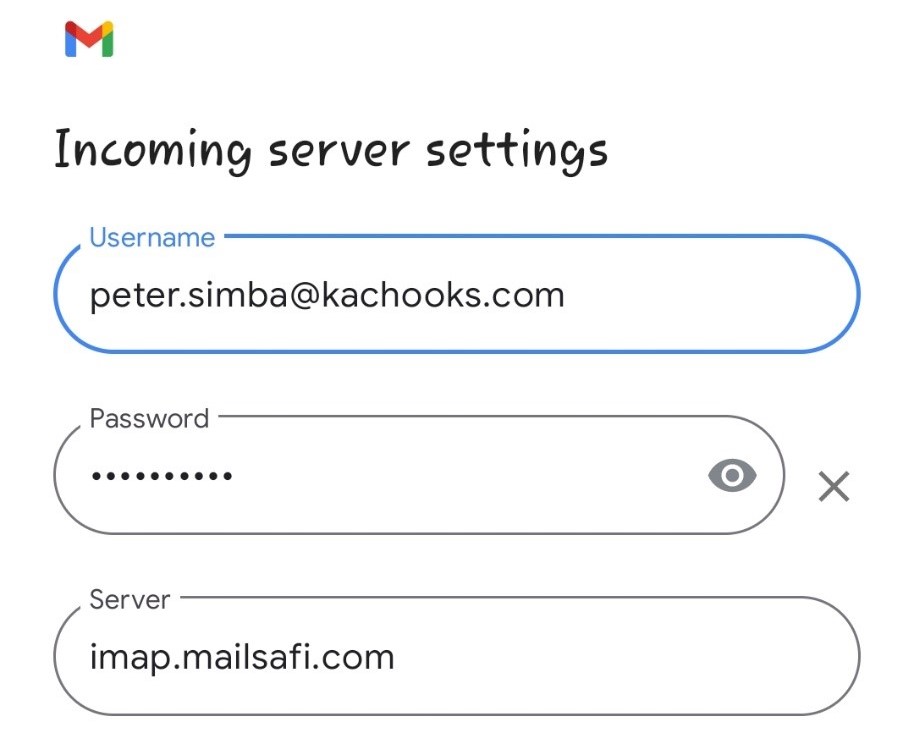
Step 8. On the Incoming Server settings, input your username, password and server.
Server: imap.mailsafi.com
Click Next.
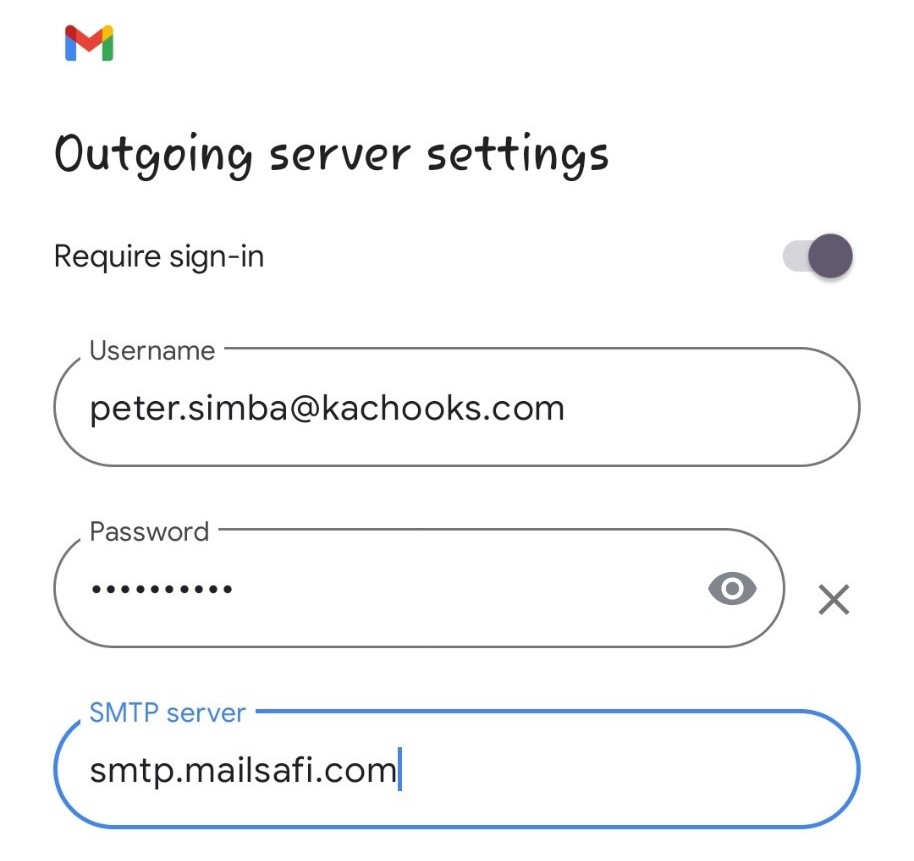
Step 9. On the Outgoing Server settings, input your username, password and server.
Server: smtp.mailsafi.com
Click Next.
Step 10. If you receive the pop up below regarding email security, click edit settings

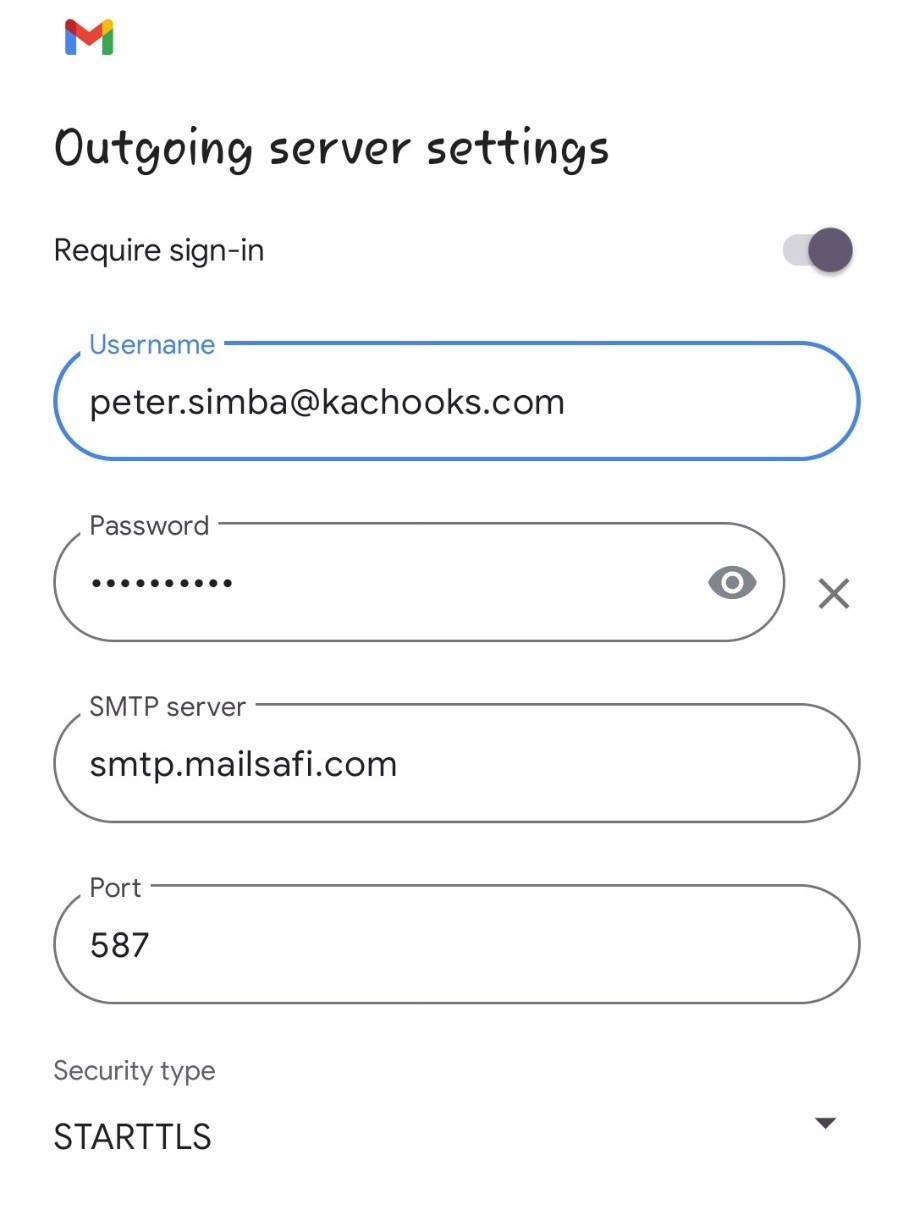
Step 10. Input the username and password that you set initially.
For the other details,
SMTP Server: smtp.mailsafi.com
Port: 587 or 465 (Any of the two should work fine)
Security type: StartTLS
Click Next.
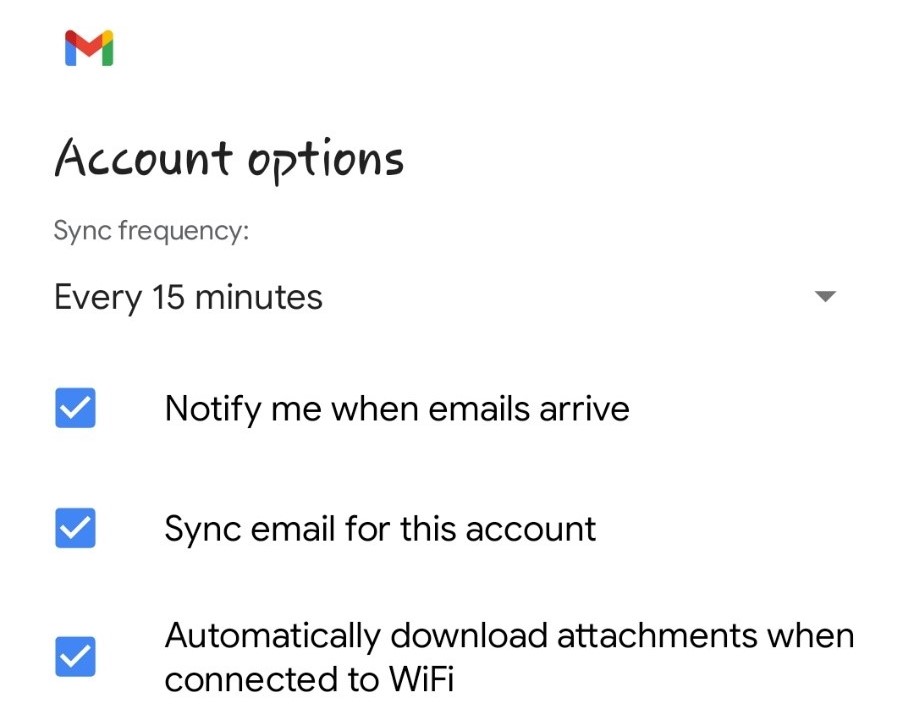
Step 12. Proceed to the Account Options, set up your sync frequency or leave the defaults as shown and click Next.
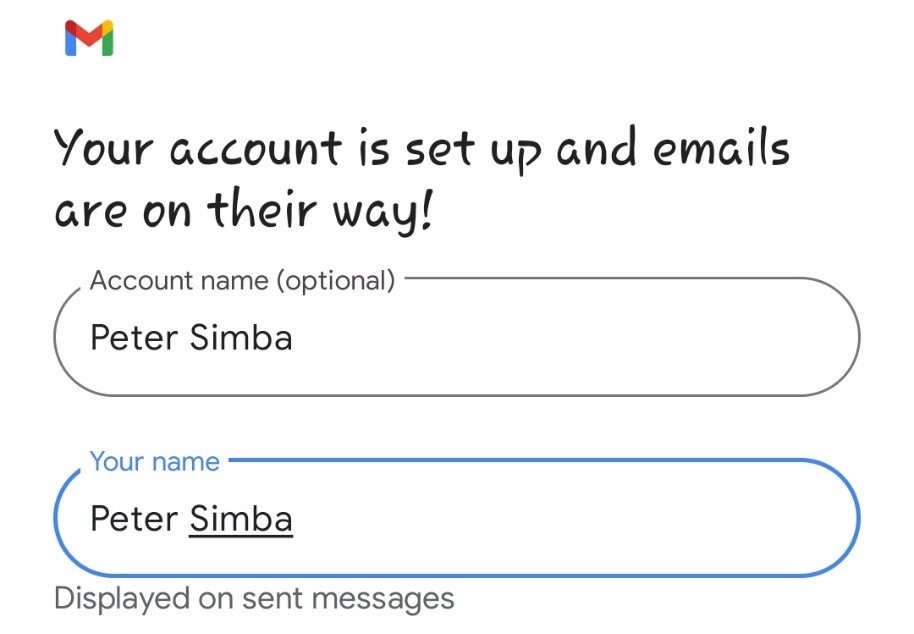
Step 13. Set up your Account Name and Display Name and click Next.
Complete! Your account should now be added successfully to the Gmail Application.